“We delight in the beauty of the butterfly, but rarely admit the changes it has gone through to achieve that beauty.” –Maya Angelou
As we step into spring, it’s a busy flurry with testing underway and an abundance of school events in full swing.
One of the events that’s always a biggie at my school during this time of year is Open House, where we showcase student work in the classroom and parents come to visit. I have the kids be the ones to give their families a tour of our classroom with a scavenger hunt. Since I just stand back and chat with parents while they are perusing, the actual night of the event itself is pretty effortless.
BUT all of the prior preparation that goes into Open House is where the hard work lies. That beautiful butterfly of a classroom environment didn’t just magically appear- all of the student work being displayed on bulletin boards and in portfolios had to go through several stages. It wouldn’t be an understatement to say that the classroom and the students themselves undergo a complete metamorphosis.
I’m sure you saw where this was going! Butterfly life cycle activities always work great for Open House and can easily stay up as a bulletin board all spring long. It’s a nice bonus that these activities integrate multiple subject areas as well (reading, writing, science, and art). Here are a couple of my favorite read alouds to introduce the topic and use as mentor texts:
“Waiting for Wings” by Lois Ehlert

“A Butterfly Is Patient” by Dianna Hutts Aston & Sylvia Long

“Gotta Go, Gotta Go” by Sam Swope & Sue Riddle

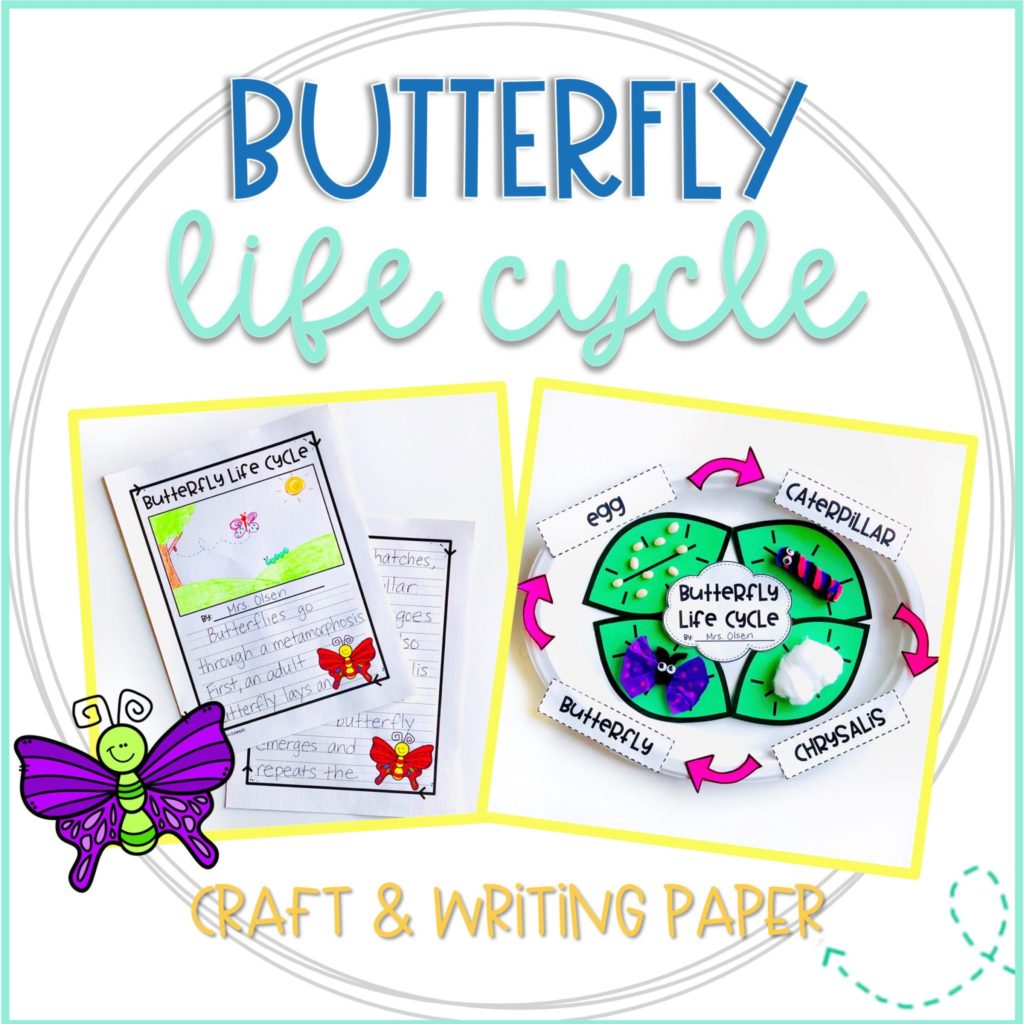
With butterflies on the brain, we work through the entire writing process (brainstorming, outlining, rough draft, editing/revising) to explain the steps of the life cycle in an informative paragraph. When the kids have made their way through all of those stages of the “student writing life cycle” and their paragraph is ready to publish, they get to use the special final draft paper (here’s my sample).

They also do a flow map craftivity to pair with it. It does require a few extra materials, but the kids really enjoy it and the craft is very eye-catching when displayed with their writing.
Here are the materials we use:
- Butterfly Life Cycle Template
- Oval shaped paper plates (32 cm x 25 cm) or white construction paper cut into an oval shape with the same dimensions
- Small white beans
- Pipe cleaner
- Pencil
- Cottonballs
- Color tissue paper cut into small rectangles (about 3” x 2.75”)
- Scissors
- Liquid glue & glue sticks
- Optional: Glue gun, googly eyes, crayons/colored pencils, paint pen

I copy the title and other text on white paper, and the leaves and arrows on Astrobrights paper.

The kids cut out all of the pieces and start by gluing the leaves and the title onto the paper plates.

A quick word about the plates. I like using them because they are more sturdy than gluing everything onto paper and they make the student work “pop” a little more. The Chinet oval-shaped plates seen in the picture can be found on Amazon (since they’re a little pricey they’re great to buy in bulk, especially if you plan on doing this same craft in the following school years). You can also find them at Target or most grocery stores. But if you’d rather not purchase plates, cutting white construction paper in a similar oval shape works just fine!
After that, the kids assemble items onto the leaves for each step of the life cycle.
Egg
For the eggs, I buy a cheap bag of small white beans at the grocery store. I give each student a few beans and they use liquid glue to attach them. I’ve found that the liquid glue works completely fine, but you could use a glue gun if you’re worried about them falling off.
Caterpillar
I cut pipe cleaners in half ahead of time and then show the kids how to twist them around a pencil to make a caterpillar (you could use 1, 2, or 3 pipe cleaners together depending on how many colors you’d like).

They get a kick out of adding googly eyes too.

Chrysalis
For the cocoon, I give each student a cotton ball and show them how to fluff and stretch it out just a bit without breaking it.
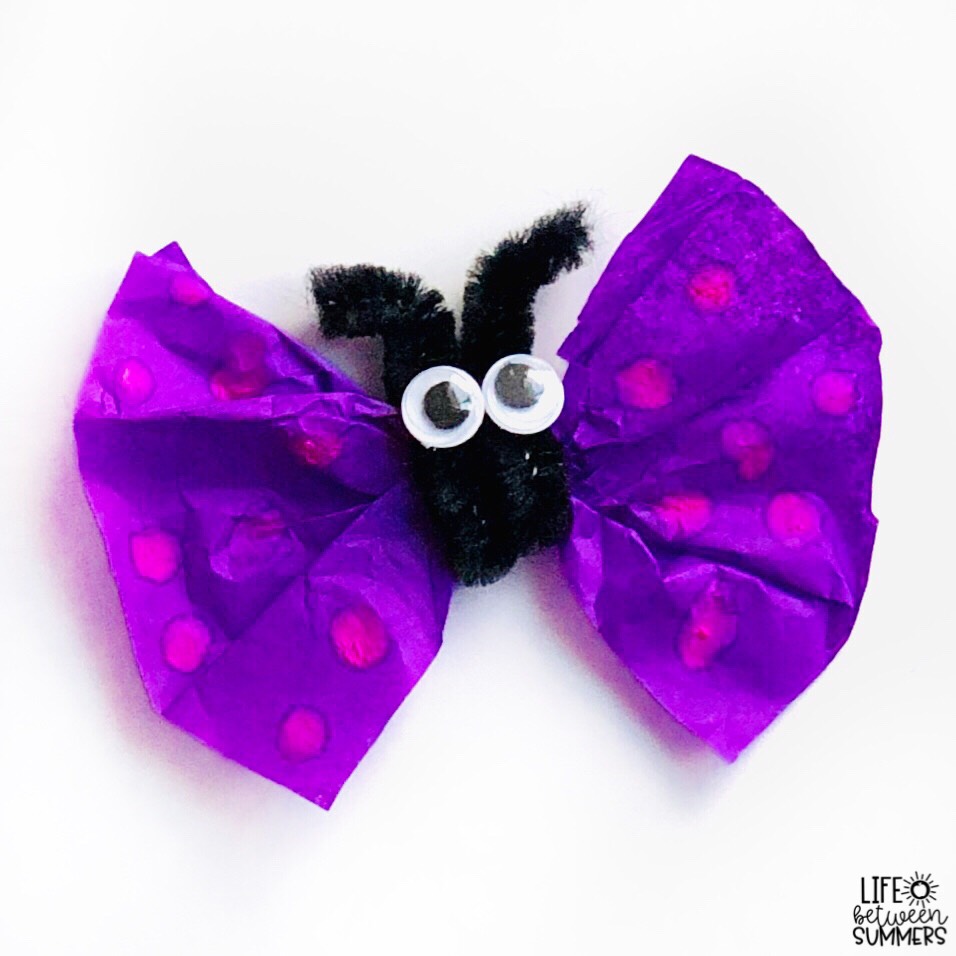
Butterfly
Each child gets a small, rectangular piece of color tissue paper. They pinch it in the middle and twist pipe cleaner around the middle to secure (this requires a bit more fine motor skills, so some students need assistance with this). Depending on your class or grade level, you might opt to have an adult volunteer help with this part.

We mold the top ends of the pipe cleaner to look like antennae and add googly eyes. You can just use the solid tissue paper, or another option is to have students use a paint pen to add some designs to the wings (if you decide to do this, do that step and let it dry before pinching the middle and securing with pipe cleaner).
The last part is simply using a glue stick to attach the labels next to each corresponding leaf, as well as the arrows in between. And, voila! There you have it, the butterfly life cycle on a platter.

If you’d like to try these butterfly activities with your own class, the final draft paper for the writing and the templates for the craft can be found right here in my online shop and also in my store on Teachers Pay Teachers.
A great extension for these butterfly activities is to provide the opportunity for kids to see the real thing. These kits make it so easy to have a real caterpillar habitat in the classroom (setting the butterflies free at the end is an amazing experience for them too!)
RESTCLOUD Insect and Butterfly Habitat Cage Terrarium Pop-up 23.6 Inches Tall
Insect Lore Butterfly Growing Kit – With Voucher to Redeem Caterpillars Later
Nature Gift Store Live Butterfly Kit: Shipped with 5 Painted Lady Caterpillars Now- Pop Up Cage
Feel free to share some of your own favorite activities for teaching the butterfly life cycle, or for spring in general, in the comments below. And during these next couple of busy months, keep that spring in your step! Summer will be here before we know it.