Along with student work, the most valuable “decor” on classroom walls is anchor charts! While pre-made bulletin boards and printed posters can certainly contribute to a classroom environment, anchor charts are arguably the best use of wall space given how helpful they are for kids. Here is an ultimate guide, complete with anchor chart examples, storage ideas, and time-saving hacks!
What are Anchor Charts?
Anchor charts serve as a useful tool and visual reference for skills that students learn throughout the year. They can often be misunderstood as being the same thing as a poster. Even though posters and anchor charts both serve as a visual tool, there is a distinction between the two. Here’s a quick, helpful reference from Buzzing with Ms. B:
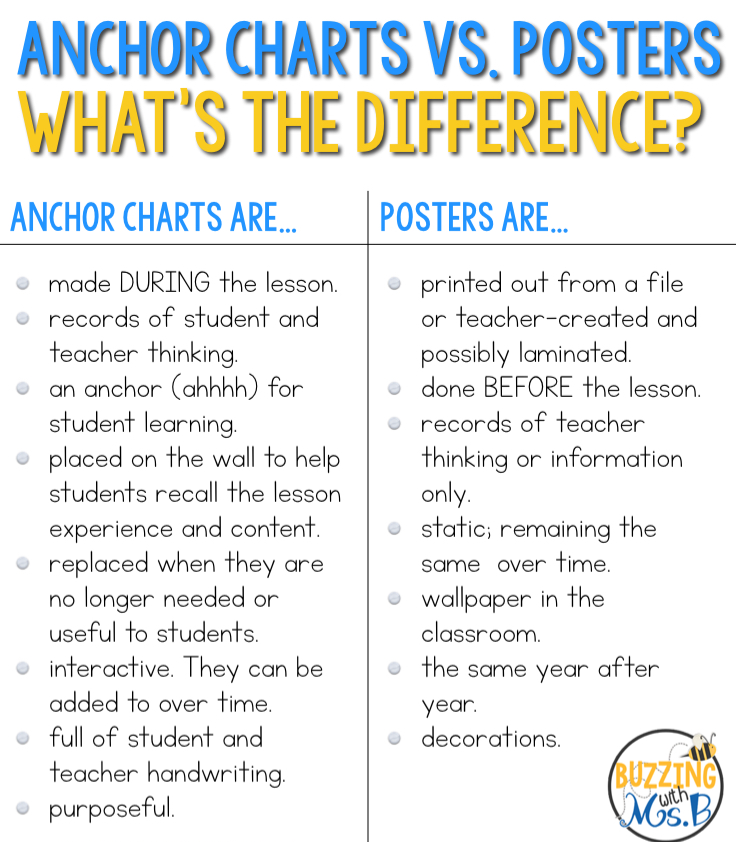
Overall, anchor charts are more collaborative and student-centered. They are meant to be an interactive tool where students can take more ownership of their learning.
Ways to Showcase Student Responses
Students should be directly involved in the creation of the anchor chart. Here are a couple ways to make anchor charts kid-centered and interactive:
1) Pick different students to write directly onto the anchor chart. If you’re concerned about crossing out mistakes or the size of the handwriting, have the kids write in pencil so they can erase if needed! After that, you or a student could go back and trace their writing in pen or marker afterwards. This will help make it visibly easier for everyone to read once it’s displayed.
2) Give students sticky notes to write or draw on, and display those on the chart. Here is one example of the use of sticky notes, on a homophone anchor chart for there, their, and they’re. Students were asked to write one of the words in a sentence, using the correct spelling in the correct context.

Making Anchor Charts Interactive
Have students interact with the anchor charts regularly. If students need a refresher on a rule or concept, make it common practice for them to refer to the anchor chart. Encourage them to ask to get up from their seat and take a closer look if needed.
Students can also continue to add to anchor charts, even after the lesson is over! For example, here is another chart we did for homophones. I had students add pairs of homophones onto the chart whenever they found new examples in a text.

You can visit this blog post for a template of this particular anchor chart and the pears writing craft, plus more ideas for teaching homophones.
And here’s another example of an interactive chart. When we were reviewing the parts of a sentence, students worked together to match the subject with the predicate using sentence strips. Our class then edited one sentence with editing marks each day as a grammar/writing review.
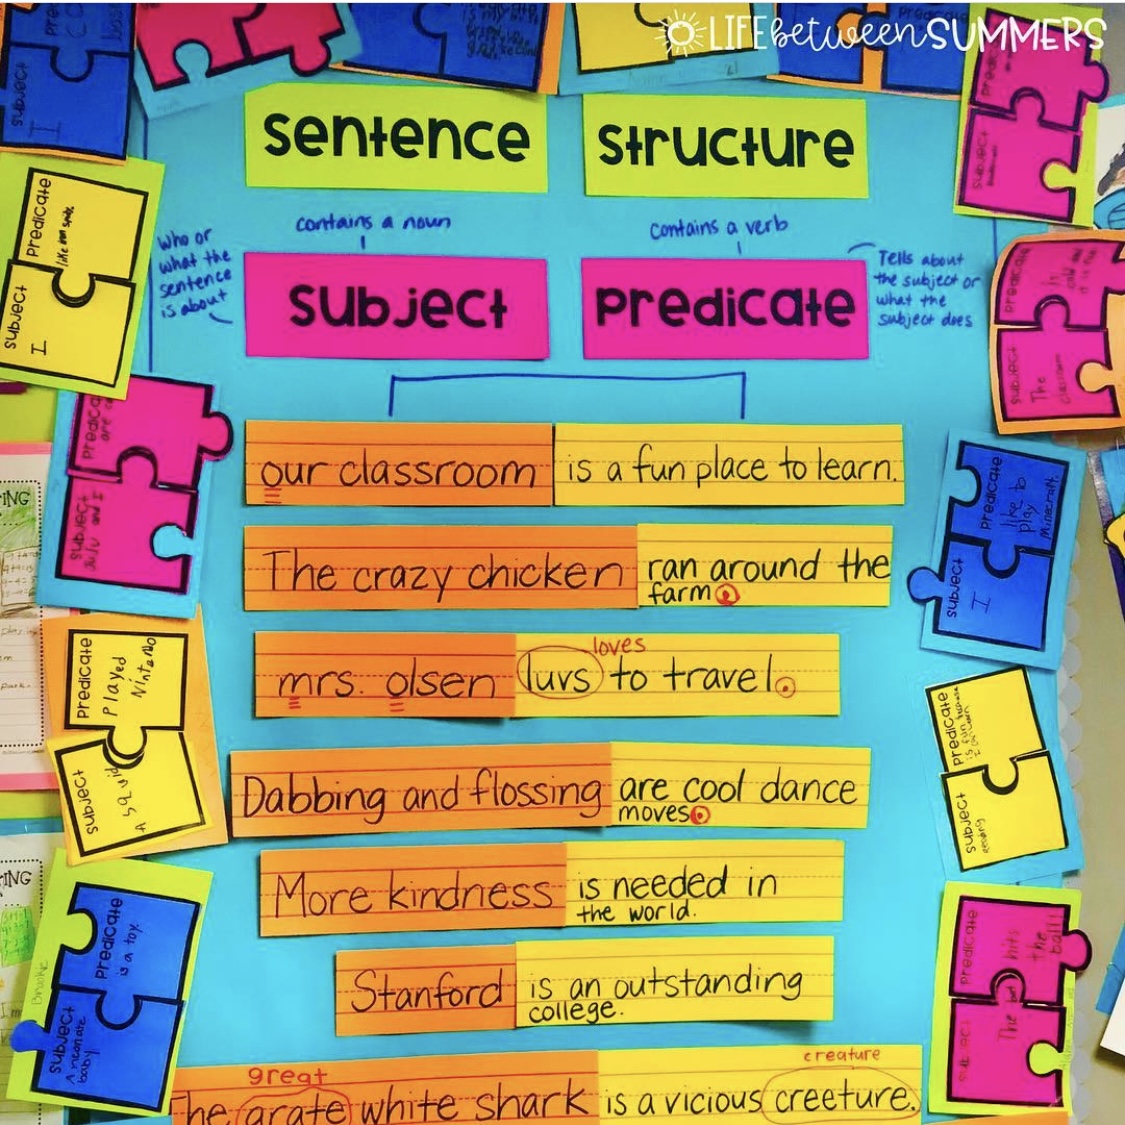
If you’re interested in learning more details about this activity for teaching the parts of a sentence, you can visit this blog post.
No Frills Anchor Charts
In regards to design, let me start out by saying that anchor charts do not need to be “cute.” You’re often short on time, or sometimes you need to just whip up something on the spot. The most important thing is the actual content and what students get out of it.
Here’s an example of a chart with no frills, but helpful content (students helped brainstorm all of the reading strategies at the bottom):

Anchor Chart Design Tips
If you do prefer to make your anchor charts more aesthetically pleasing, there’s nothing wrong with that either! Beautiful anchor charts might give you those positive feels about your classroom environment. So in that case, then why not?
Here are a few easy ways to “pretty up” anchor charts without compromising too much of your time:
#1: Use different borders. This is a really simple way to make your posters look nicer, and it still leaves room for lots of collaboration. Here are some of my favorite anchor chart borders that are quick to draw:

#2: Use lots of different colors! You can use lots of bright or complimentary colors, or even match them to your classroom color scheme if you have one.
#3: Use variation in lettering. Make points of interest stand out on your poster by underlining, using all caps, or changing up your writing style. If you can draw block and bubble letters, it’s your time to shine! Here is an example from Mrs. Johnson’s Room where she used different lettering:

How to Save Time Making Anchor Charts
No need to be prepping anchor charts for days! Here are a few ways you can save your precious time:
1) Before class, create just the bare bones of the anchor chart (such as the title, headings, drawings,, border, etc). The rest can be filled in during class.
2) If you teach multiple classes, laminate the bare bones anchor chart, so you can write on it during each class and then erase. This will also save you time if you want to re-use the same chart in future school years.
3) Use digital charts! See the section right below for tips on this.
How to Utilize Digital Anchor Charts
If you aren’t the super artistic type (or want to save yourself time), then digital anchor charts are a great way to “cheat.” Here are 2 ways to use digital anchor charts.
#1: If your school has a printer, you can have a digital anchor chart printed as a poster. This is probably the easiest way to do it, if you have access to this technology. Just print the bare bones, and students can help fill in the rest.
#2: Display the anchor chart through a projector, and tape a blank sheet of chart paper to the board or wall. Then just trace it! This will allow you to create artist-worthy pictures and write in various fonts.
Here is an anchor chart I created from projecting a digital anchor chart. The bottom part of the snowman and little “snow hills” next to it were left blank at first (so that part could be filled in together with the kids).

If you happen to teach this grammar skill and would like the same anchor chart template, it’s included with my compound sentences winter resource.
Anchor Chart Storage Ideas
Due to limited wall space, you may need to save and store some of your charts to pull out again when needed. And as the year progresses, you can start to accumulate quite a few! The issue of storage therefore comes into play. Here are a few common ways that many teachers store their charts:
- Roll them up and wrap them with rubber bands
- Store them in a portfolio bag
- Place several together on binder rings
- Use clip hangers
Personally, I’ve always liked the clip hangers the best. I’ve found they keep the anchor charts neat and easily accessible. If you have a storage cabinet with a rod, you can place them there. If not, you could hang them from command hooks or waterfall hooks.
I’ve even added labels to the hangers before, so I could find the charts I needed quickly and easily!

I just printed the text on Switch Up the Chart Paper
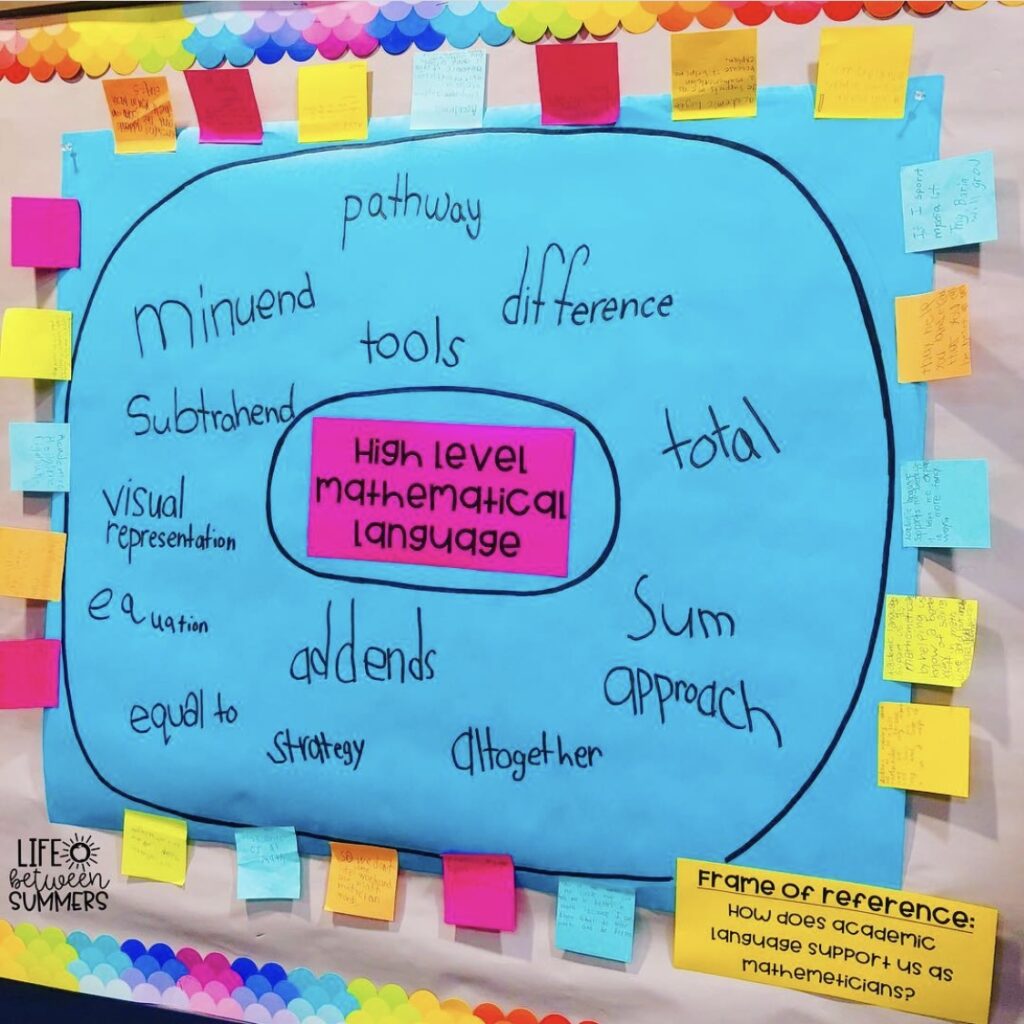
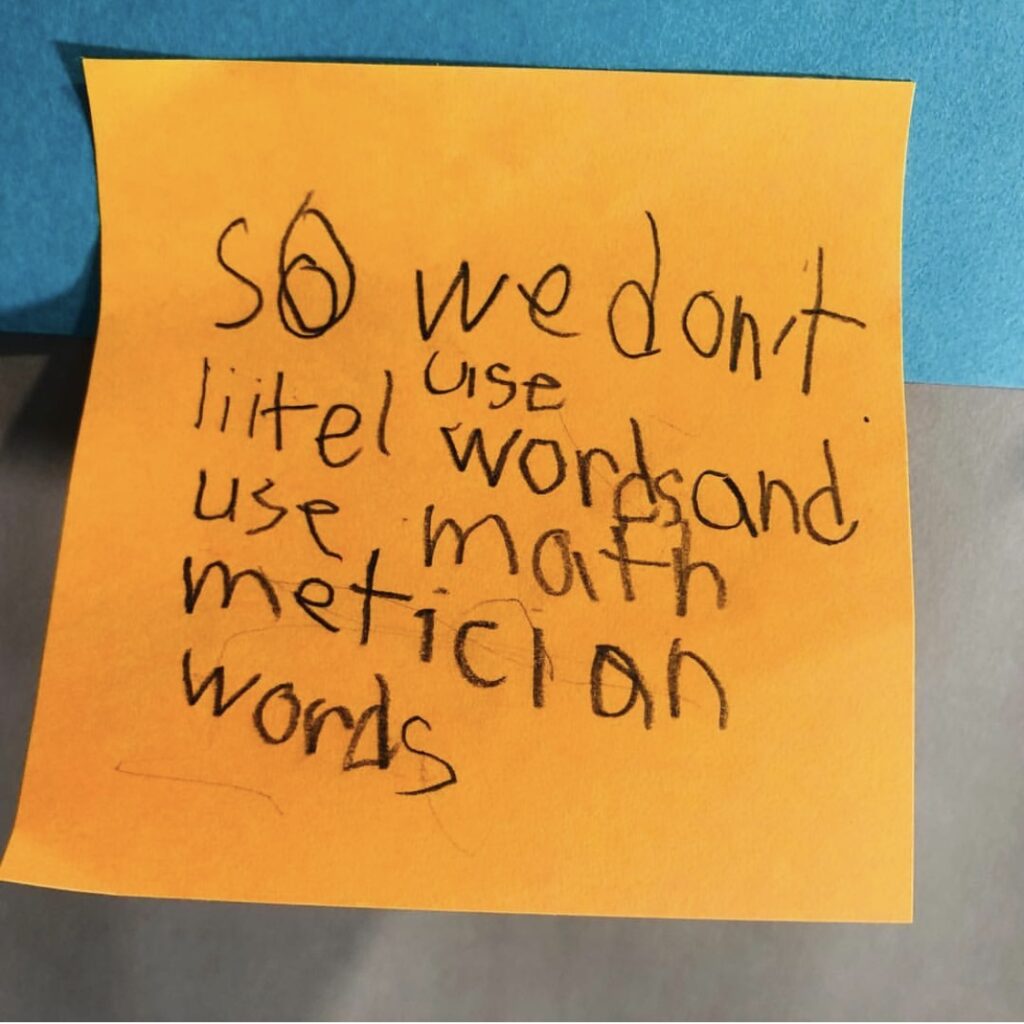
Anchor charts don’t always have to be created on actual chart paper. You can switch it up sometimes by using butcher paper too. This allows for a lot more space! If you’re interested in hearing more about the above anchor chart for math tools, there are more details right here in another blog post. You can also use different colors of butcher paper. This helps draw attention to the chart, and it brightens up the classroom too. More on this money anchor chart in the “Add a Frame of Reference” section below! A frame of reference helps students put their learning into context. Students can draw upon their own knowledge and experiences. In addition, they should also consider why it’s important for them to learn whatever it is they’re learning about. This can really help certain concepts “stick” in a more meaningful way. When creating an anchor chart together, pose a question or topic related to their background knowledge. It could also relate to how the concept might help them in the real world. For example, I asked such a question when one of my second grade classes was learning about money. “Why is it important to be able to identify coins?” They wrote their responses on sticky notes and we added them all around the border of the chart. This simple addition to the anchor chart helped provide a meaningful backdrop for their learning. And it gave students more buy-in to want to learn how to count money. Here’s one more example where a frame of reference was used. It was when I was doing a lesson to encourage students to use stronger math vocabulary when explaining their thinking. You’ve got to love some of their responses… It did help, as the kids were more motivated to use more “fancy” math vocabulary during Number Talks, math lessons, and also in their writing. You can utilize a frame of reference not only for academic concepts, but for classroom management as well. For instance, here’s an anchor chart I created one year when I had an exceptionally chatty class. It was very effective in helping to curb the blurting. As a class, students sorted the different situations (on the blue squares) onto which side they thought they belonged. The frame of reference question was: “Why do you think it’s sometimes more important to listen than to talk?” Once again, students responded on the sticky notes you see around the border. You can get more details about this anchor chart (and more classroom management ideas) by clicking here. Well, there you have it! Whether you’re an anchor chart enthusiast or just getting started, hopefully some of these ideas might be helpful for your class. If I were to create an anchor chart about anchor charts, the frame of reference question might be: How do anchor charts help benefit students? From all of the possible responses, it’d be easily clear to see how truly beneficial they can be!Add a Frame of Reference

Use Anchor Charts for Classroom Management
Anchors Away!


